There are some rules to this game. One is no power tools. I cheated once, but I did not want to go out to the shop (-15C) and unearth a hand drill. No matter, 4-year olds (4YO) can use a cordless drill. Second is to keep asking yourself if a 4YO can do this step. Here I use experience as a guide. Third is to remember that while 4YO are very enthusiastic, their patience is limited. So instant results are desirable. Almost indispensable.
First job is to put the stick in the workmate and shave it down. I used a spoke shave; it is too small for a drawknife.
 When I got through the stick was about 9mm diameter. Good enough, I am not trying to fit some particular buttonhole. Next job, cut off a reasonable length of stick. Again eyeballed. What you want for all sawing operations in this project is a very fine-tooth, narrow-kerf saw. My japanese miniature dozuki is ideal.
 Almost any fine-tooth saw will work, however. It wants to be fine-tooth because the buttons will look awful if the teeth are too coarse. So quite by accident I now have a 90mm by 9mm rough cylinder. At this point it pays to stop and think. You could, of course, cut off slices and then drill them. But it is much easier to reverse the process. Drill first and cut later. This will save a lot of time later (rule three). Furthermore the holes will be all at the same spacing. But before you drill, take a moment to find the center of the piece, figure out the hole spacing (in my case 5mm) and center-punch the holes. I used my carbide-tipped scriber as a center punch, because it was there.
 Explain to your 4YO that this keeps the drill bit from wandering all over the landscape. Let her try it on a piece of scrap. Now you can drill. Select a very small drill bit. About 2-3mm is right. I always have a set of Black & Decker cheapos on hand, in RGU of course; the one I picked was the second-smallest, 5/64" whatever that may be; about 3mm. The exact size does not matter. But keeping the bit exactly parallel to the long axis of the cylinder sure does matter. Here is where parental help is needed. Have 4YO hold drill. Check angles while she does. Coach until drill really plumb. Some drills have bull's-eye levels built in. Fine, use them but remember the stick has to be plumbed first. Get out the old square. If you hog up this step you will have to start from zero. Drill away:
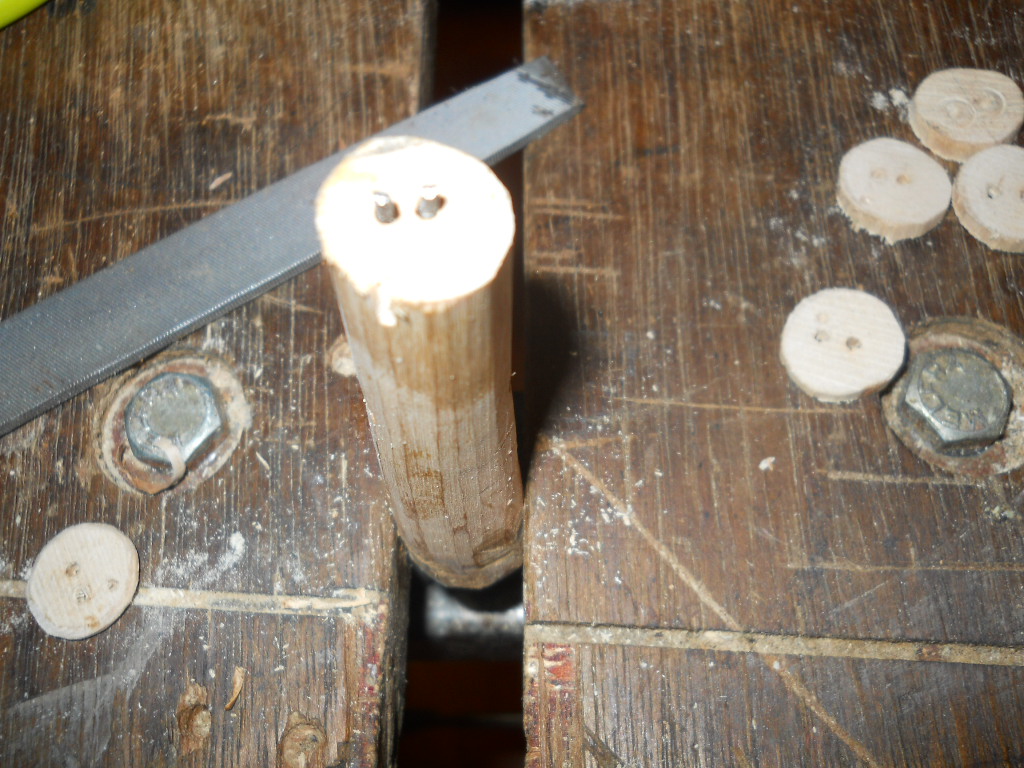
 Now the eyes are in. It is now a matter of sawing off slices; each slice is a proto-button. But is nice, indeed desirable, that the buttons be the same width, or close to it. What I did is to use a marking gauge. In this case, my miniature Japanese-style marking gauge. I made it out of a bamboo chopstick and a piece of scrap wood with a blade made out of scrap steel. But commerical marking gauges are widely available.
 I set the marking gauge to 3mm for the first button. I thought that was a bit thick, so I reduced it by one skosh (= 0.5mm). Now you do not have to use a marking gauge. There are many other ways -- ruler and pencil in the worst case. But the marking gauge is nice because it cuts a groove for the saw. Because what we do next is saw off buttons. It looks exactly like the second picture in this post. Run the dozuki. Every mark/cut gets you a button.
 For your 4YO, the marking gauge leaves a razor-sharp outline she can follow with the saw. This minimizes the uneven cuts that will produce lopsy buttons. I made a half-dozen buttons this way. With a good dozuki it takes 30 sec to saw out the button.
Now, from a certain viewpoint, we are done. But if we want to do the job well, we must explain to 4YO that we need to chamfer the buttons. That is, we have to put an edge on them, so they will go through buttonholes easily. At first I thought, well, a knife. But 4YO might not be all that enthusiastic about knives. Might get cut. For that matter, parent might not be so hot about knives in 4YO hands, either. So after some experimentation I came up with the idea of filing the edges. I'll spare you the varous things I tried. But the bomb, as my younger friends say, is to make a holding jig (or fixture) for the buttons. So you have the stick you started with -- still in the workmate. With any luck the holes are still there. Push some stiff wire into the holes and cut wire off at button height.
 Beacuse you drilled the holes first, these will fit any button you have just made. Put the button on the wires. Get a coarse file and file away. Sharpen them edges. Poor photo coming up.
 The little wire prongs hold the button down, and you can file your way around the button. Very difficult for your 4YO to hurt herself with a file. Coarse file works fast. Rule three again. You could do all sorts of other things, like sanding. But at the end of the day we have some buttons.
 Now one could do a lot of this stuff much more easily on a lathe. Make the buttons with a form tool. Part them off with a really thin parting tool. But my objective, in this excruciatingly detailed tutorial, is not really making buttons. It is suggesting to some parent how to teach his 4YO to make buttons; a completely different problem.
I often (ok, every now and then) do the same. Only I drill the holes, then carve the button nice and so on the end of the stick and *then* cut it off. Wash, rinse, repeat.
ReplyDeleteThis is one time when some sand-paper actually comes in handy; rub the bottom of the button on the sand-paper. Sometimes I also countersink the holes just a wee tad on top, believing that this will make the thread less likely to fray.