Friday, June 29, 2012

Disaster strkes again!

My son and I have a joint project. We will make custom picture frames. He will paint what goes inside. A Fair division of labor; beause I am not an artist. Oh, I will do a reasonably artistic carving. But that does not make me an artist! When we add computers into this mix of art and craft, we have a recipe for a disaster, and that's just what happened. I have no bones in telling you the whole thing. Someone may learn something from it, after all. The thing about our custom picture frames is that they should not be vanilla store-bought frames. They should be carved by hand. And shaped by hand. The latter idea is my contribution to art. So, OK, I have to make a frame for a picture, and I even have to carve it. I have been practicing the carving part . And making tools for it, because commercial tools fall far short. The carving is the easy part. Shaping the ground is the hard part.

So this is a very lengthy introduction to a new subject: making weirdly shaped planes. I have absolutely zero experience in the area. So please bear with me as I learn. Nowadays weird shapes are made with routers, but I defy any router user to make his own shaped bits. But before routers were invented people planed moldings with planes. So I have said, let us make two planes: a rounder and a hollow. Both semicircular. And here follows the tale of these two guys. Here's what I have learned. People have not done this for about a hundred years. Some have. But they are not easy to find. Furthermore, the ubiquitous router gets in the way.

First you make the blade. So I want one one blade that looks like a semicircle. I lay it out and I drill holes that match it.
Next step is to drill some holes close to the profile of the piece. There, I knew I could get a picture into this thing. After that it's all file work. Tedious. But art knows no limits. File away and you, too, may be an artist. Much more important yhat you understand what I am tryng to do than how I did it. After all I have yet to succeed. And that's where disaster comes in. I have so far ruined two hollows. More to follow.

Friday, June 22, 2012

The summer of the scythe

The scythe is a very old tool. It probably evolved from the sickle. Egyptian pictures show people using sickles to cut grass or grain. Some genius figured out later that if you put a long handle on it you don't have to bend over. I do not know if the Romans had it (you can always consult Wiki) but by the middle ages it was well established. In the US it was used to cut wheat well into the 20th century, being eventually displaced by machinery. Scythes are now making a comeback, I am happy to report. Lots of scythe blogs and websites on the Internet.

There are two broad designs of scythes. The European and the American models. In my opinion the European scythe is much better. Maybe at one point, a hundred years ago, we made decent scythes. Not any more. Only Austria does in Europe, for that matter. The handle you can make yourself; it is not exactly rocket science and I intend to do just that any day now. The handle must be custom-fit. But I bought mine from ScytheSupply, a US supplier, as a kit, and I am glad I did. It cost no more than a midrange lawnmower. It included everything I needed.

Here's 
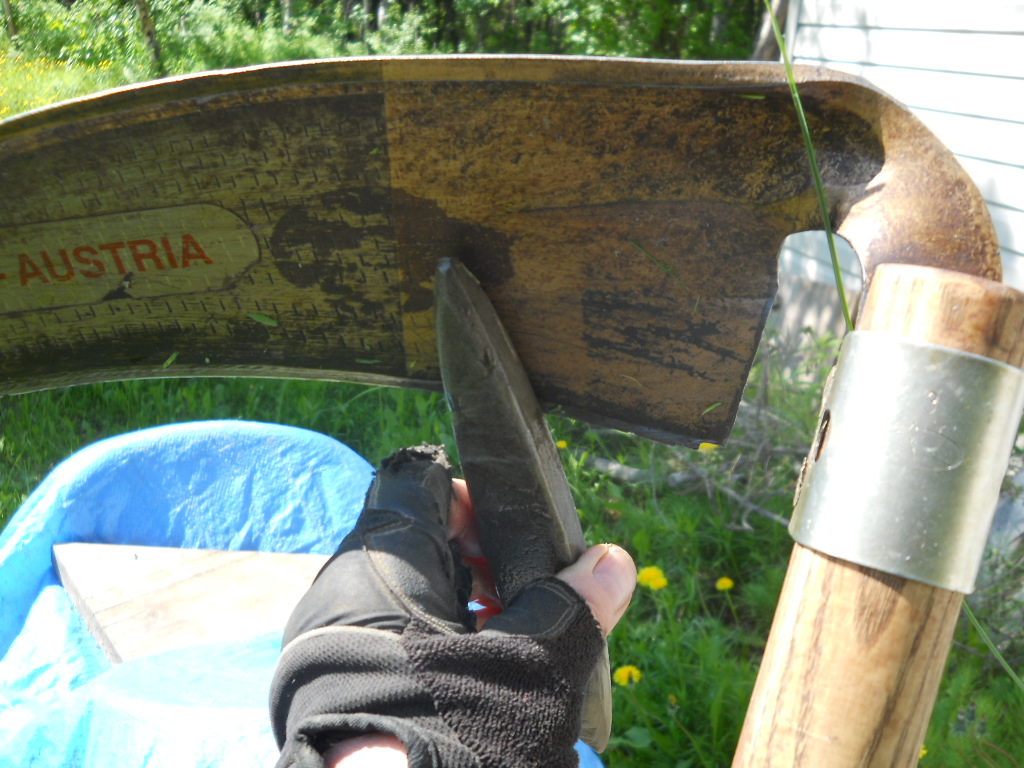
Maximilian the Scythe. Max has a brush blade. When I acquired it there was brush all over the place. Most of it is gone, thanks to Max, so I am thinking of acquiring a grass blade to supplement Max. I'll make the handle myself.
Maximilian is going into the shop for sharpening. This is, you see, really a sharpening post. A (European) scythe is sharpened like no other tool. It first must be peened. Strange? Read on. You peen once or at most twice in very heavy use. Attached to the scythe is my scything belt. It consists of a water bottle and two important implements. One is the square 6mm key used to get the blade off the handle. The other is the Steinfass. This is a tin swimming pool for a waterstone; it hangs diagonally from the belt. It is filled with water, and in it the sharpening stone is enjoying its bath. It is hot! 25C. The word Steinfass is German or Swiss-German, I got it from Drew Langsner's Handmade. It obviously means "barrel for a stone" and no Swiss farmer would be caught dead with a tin Steinfass. He would make his own out of wood, elaborately carved in the dead of winter. A nice project, by the way. Anyway, we ply our key, get the blade off the handle, and walk into the shop. We walk up to the peening station.
This is a stump of log with three things on it. The big round thing is the anvil. The two other things are collars. One of them has one groove cut into it, the other two grooves. One and two. Get collar number one. Squirt some WD-40 over everything. Slip the collar over the anvil. Find your trusty hammer. Any old hammer will do. Slip the stump between your knees. Hold it tight. Do not sweat how tight. This is not brain surgery. Just keep it steady.
Now slip the blade in between collar and anvil. The factory logo should be up. The edge should just kiss the center post of the anvil. Keep the blade perfectly flat on the anvil. Whack the collar with the hammer. If you did it right you will get a nice sharp ring. If it goes clunk, you were holding the blade off the anvil. If it went clunk, play it again, Sam. Now slide the blade over about 2mm. Repeat. Eventually you will get to the end of the blade. It takes me far less to do this than it does to write about it! About two minutes.

You are at the end of the blade, the tang end. Remove collar number one. Put on collar number two. Work your way back to the narrow end of the blade. Remember, listen for the nice clear ring. Anything that does not go ting! (but does go clunk!) means you were not holding the edge flat on the anvil. First time you do it you will have to tune your ear. By now I am on automatic.

The real pros do this with a hammer, freehand, on an old stump. Good on them. They are pros. I am not! I use the jig. That is why we have jigs. Four mintes flat; less if I am using the scythe frequently and am really movin' metal. And that is exactly what you are doing. As the scythe cuts the edge is worn away. The edge is very, very thin. You are moving metal from the unworn parts of the blade into the edge.

We are almost through. Not quite. Go outside. With your key, put the blade back on the handle. Now buckle on the belt. Extract your stone from the steinfass. Not doubt the stone is annoyed at having to go to work on a hot day.
The stone is natural sandstone. It is used to hone the scythe. Holding the stone flat on the bevel, take about four passes. You will do this many, many times as you scythe, so pay careful attention now. You hone every five minutes or so. Four passes is ample. Now to work, Hi ho, hi ho....
My target is this dandelion-rich field. If not cut off now they will spread. It isn't very big. You might say I could drive Achilles the mower over it. But it is irregular. Mower will stall on irregular terrain. Not made for this kind of stuff; mowers are made for suburbanites. Much more fun to scythe it. So now we get into how to actually use the scythe. This is beyond the scope of this post. Later. Or go to YouTube. You will find a lot of videos of 12-year old girls and 80-year old grandfathers scything hay. But we did it.
With a scythe, you cut a semicircular arc. You swing right to left. Even I, a lefty, swing that way. At your left, end of swing, you pile up a windrow of mown stuff. This bit of field took far too long. But it happens every summer. I start mowing and it seems to take forever. It does. That is because I am not out of shape but out of practice. In winter a scythe is totally useless. So it takes me a few hours to get the rhythm. Why am I such a klutz? I am not. I just need to scythe some more. Never hurry when scything. Just enjoy it. Total Zen. Hint: if it seems like an effort you are doing it wrong.

I am almost ready to get a grass blade for the scythe, because I have cleared the brush out. Mostly. A grass blade cuts a wider swath than my 45 cm brush blade. Grass blades are typically 65 cm long, and much narrower than brush blades. But my 45 cm brush blade has served me well. I will make a new handle for the new blade and Max will enjoy his honored place of Senior Scythe.

Wednesday, June 20, 2012

Garden Update

We interrupt the sharpening thread to bring you news of the garden. For those of you who are not gardening fans, this must be just as boring as sharpening tools. But gardening is much more fundamental. It involves growing your own food. You see, we are all dependent on a very elaborate production and distribution systems to eat. Eating is the basic human activity. Without it we are dead. People simply go to the supermarket; an interesting term. Where did the food in Safeways come from? Neither you or I have the slightest idea. Even if you follow the precepts of health and avoid processed food, the cabbage you bought in Florida may well have been planted in California. Ridiculous? Not so much. It might actually be cheaper to grow it in Cal and ship it to Fla -- it fuel is cheap enough. And cheap is the name of the game. But if shipping costs rise, and fuel costs rise, then the whole system breaks down. Which is why I plant my garden. I wish, in a word, to be self-sufficient. But enough ranting. (Then again, it's my blog. I will occasionaly put in a rant. Else what's a blog for?)

Now gardening in Alaska is no mean feat. The growing season is extremely short. In Iowa they think of planting on March or April. Hah! In those months I have snow on the ground. But on the other hand, we have a lot of daylight. Just about 24/7. We must compensate. So we plant as early as we can. All a gamble. Most people (myself included) plant Memorial day, end of May, as you have seen from previous posts. I do a lot of transplanting. Stuff grows in my windowsills. I plant in March too. Only indoors!

This is today's picture. I put in the last transplants today, a bit late by my standards. But first I had to get rid of the weeds. An excruciating task. Now everything is in place. The radishes, the carrots.. . and so on. Now this brings up a point. Observe all the dandelions in the picture. Fortunately they are good to eat; they add spice to a salad (if young) and can otherwise be boiled up as a green. Roots are supposed to make a coffee substitute. The French jardins marechières (market gardens) used to grow them as a crop! But I have far too many of them. In suburban lawns, these things are regarded as pests. To me they are a potential resource. Another resource is the lovely wild rose:
You can make Rose Hip Tea out of them. Rich in Vitamin C. Do not neglect the lowly weed. Go read Euell Gibbon's books and see what you are missing.Mr. Gibbon's most famous book is Stalking the Wild Asparagus. There are other books. I no longer give citations, because if you Goooooogle on Euell Gibbons you will get all of them. Dear Suburbanite: do not sweat your dandelions. Eat them instead. You are actually growing an edible crop. But please, stay clear of pesticides. Pesticides are not good to eat at all.

Saturday, June 16, 2012

Sharpening II: a gouge

A chisel is perhaps the easiest thing to sharpen by hand. A gouge is an entirely different animal. Gouges are sort of like a pipe split down the middle and sharpened on one end. Here is an example:
The static picture of a gouge being sharpened is exactly the same as a chisel being sharpened. But there is one important difference. If you were to hold the gouge in one position, the rounded bevel would be flattened! This is not good. The bevel must be a perfect round. So you have to rotate the gouge as you rub back and forth on the stone. You must of course hold the gouge flat on its bevel. But don't hold it there too long. Slowly rotate the gouge. If you do this, you will get a nice circular bevel.

The question arises as to how you get the bevel in the first place. Well, if you have just bought a gouge, stick with the original bevel until you have got the rotation bit down pat. However, all bevels are not created equal.

Basically there are three kinds of bevels. Carpenter's bevels , carver's bevels, and turner's bevels. A carpenter uses a gouge to remove wood in a hurry. Typical carpenter's bevel is about 32 degrees. I have encountered 45 degree bevels on some specimens. Now, a woodcarver would be lost without a gouge. At least 90% of wood-carving is done with gouges. Carver's gouges are shallower bevels, say 25-30 deg and maybe even less. This is because a carver has to renove wood very carefully. Else he/she does not get whatever cut is wanted. You can always make another cut. But you can't ever put it back on . Basic rule of wood and, for that matter, metal working.

Turner's bevels are are a sufficiently complicated question to warrant a separate post. The matter is complicated by the fact that most of the turners these days use power lathes. I do not. So all the lore about fingernail grinds -- about which more later -- may not really apply to foot-powerd lathe freaks, such as myself.

Synopsis: sharpen your gouge on a stone. Preserve the original bevel. Above all, constantly rotate the gouge.

One or two posts down the road, I will get into the subject of establishing a bevel in the first place.

Monday, June 11, 2012

Sharp as a razor, part I

This week it has been raining. At best, completely clouded. I suppose this helps the garden. But I have been indoors a lot. I have sharpened a lot of tools; in fact I am currently making a gouge-sharpening jig. But that must wait. I am starting a series on sharpening. In the manner of all blogs, the threads get tangled. Bears get tangled up with axes, so to speak. So I have a new label or two for this thread.

All edge tools must be sharpened. If you neglect to do so, the tool will cut badly if at all. Worse, it will slip and possibly injure you. A dull tool is a menace. True even for kitchen knives. Now, on the market you will find many machines that you are urged to buy. But before you plunk down your cash for one of these things, I recommend learning to sharpen by hand. Japanese masters begin their day by sharpening all their tools. By hand, of course. It can be a Zen activity if approached in the right way. Let us start our Zen Journey.

We do need one bought-in item for this activity. A sharpening stone. There is a huge number of stones on the market: arkansas, ceramics, carborundum, diamonds, waterstones and no doubt Plutonium chromide by now. However, in my personal opinion there are only two. Diamond and Japanese waterstones. I use diamonds on the tools I make myself, to get a rough edge. I also use it on kitchen knives, which are stainless steel. After that, it's waterstone all the way, plus a leather strop. Every time I resharpen, it's waterstones. So what is a waterstone? You will find a picture of one in the Lee Valley catalog. The one I use is labeled "1000/4000 grit." So what's a grit? A measurement of average particle size in the stone. The larger the number the more particles per cubic whatsis in the stones, so the smaller the particles are. For practical purposes 1000 is medium and 4000 is fine.

Waterstones are used sopping wet. One stores them in a water-filled "pond." Some people will try to sell you one. Don't bother. Use a dollar store basin, or cut the bottom off a large plastic detergent bottle and use that. So we have a waterstone. We have a place to store it.

You have just bought a brand X chisel. Disappointed with it? Right. It ain't sharp. Now let's start sharpening. Look at the bevel on the chisel. You will see little scratches on it (unless you bought a really good chisel at a corresponding price). You chisel has been ground on a machine. But it hasn't been sharpened. Our objective is to get rid of the scratch marks. So we unlimber our Japanese waterstone.
Here you see the very same stone shown in the Lee Valley cite above, in a homemade holder. It is soaking wet. The 1000-grit (medium) side of the stone is up. Now, rock the chisel until the bevel is absolutely flat on the stone. Now all you do is press down on it and rub it back and forth. Use quite a lot of pressure, and whatever you do keep the bevel flat on the stone. If you go slow, this is easy. If you go fast it ain't. Go slow at first. You will see a blackish powder appearing. Good. This is called swarf. Means the stone is working. It is basically metal dust and some abrasive. Periodically you lift the chisel and wipe it off. Then you feel for the burr. It cannot be seen by the eye, but can be felt with the fingers. It is a slight irregularity on the back side of the edge, the side that is up in the picture. When you get the burr, you have gone far enough with that grit. Get rid of the burr by turning the chisel over so bevel is up. Lay back side flat on the stone and give it a couple of passes. You should not feel any burr after that.

Now turn the stone over, so 4000 grit side is up, and repeat. You know, back and forth, raise a burr, get rid of burr. When you are finished, strop it. This post has gone quite far enough, so I will defer stropping. All tools are done more or less the same way, but there are many innuendoes and tricks for different tools. Such as knives and gouges. Axes are a completey diferent animal. Get to them any time now.

At the end you may have some scratch marks in the middle of the bevel. This is acceptable. Reason is your tool was hollow-ground. But you should have no scratch marks at all at the ends of the bevel.

More (like the iceman) cometh later.

Friday, June 1, 2012

A garden grows apace

This is definitely garden week. First, a few pictures of the transplant activity. These were taken by my son and sent to me. So they did not make it into the last post. Here my daughter is struggling with lettuce. She seems unconcerned.
And more transplanters at work:
Now we have to do the seed stuff. There are some plants I start from seed, namely carrots and radishes. For some reason I have bad luck with transplants. So I seed them. Seeding is not a photogenic activity. I use my trusty Earthways Seeder. Amazingly it has not acquired a name.
This is an amazing contraption. It uses plates, circular disks sort of like a Ferris wheel. It is, in fact, a seed Ferris wheel. The seed is put in a hopper, and takes a ride on the Ferris wheel. When it gets to the right place it is ejected rudely, and falls down a chute. Meanwhile, a plow-shaped thing has cut a furrow. The seed drops into the furrow. A chain dragging along covers the seed. This gadget saves hours of time and backbreaking manual labor. So I did my seeding in 15 minutes, all I had to do was push. There is a caveat: you have to use the right plates for whatever you are planting. And you must adjust the depth of the plow thingie. But it is a wonder.

Next, the greenhouse. I transplanted the tomatoes and zucchini into GH 2.0.
The more I look at GH 2.0 the more I am convinced it is a Good Thing (TM) because it is structurally sound, zero cost (except for the plastic) and while all the greenhouses nailed together around here collapsed this winter, this one stood up. It wasn't covered, you see. It took John about 15 minutes to cover it, and that's what it takes to uncover it. So its snow load is zero. And now John covered it.
The temperature in this thing is amazing. Today was 15C but GH registered 31C. Tropical. Just what you want for the greenhouse crops. At night it falls, but it is (so far) always warmer than the outside, by at least 1C. I will admit it looks a little crude. A lot crude, in fact. But who cares? I don't. Wish I coul get clearer plastic, though.

OK, now the oats have to be sowed. So John took the tiller for a walk.
This is the oat field being tilled. Oats (grains, in fact) require a great many more square meters than veggies. We have to mechanize. Sometimes John looked a little concerned.
Nevertheless the whole thing was done in about 20 minutes. Another amazing contraption. Should you buy one, do buy a rear-tine tiller like this one. Front-tine tillers work, but they will take your teeth out along with the weeds and trash. Tomorrow I will sow my oats, wild or otherwise. Very tame, in fact. Saskatchewan oats. We have another amazing contraption for that. Stay tuned.