Saturday, April 27, 2013

The ground, the ground!

It seems spring has arrived. It was rather coy. It dumped a foot of snow in March, so we had an unusal amount of it around. But "breakup" as they call it in Alaska, seems to have arrived. I know it is breakup when I can see my driveway.
We should not be surprised, but I at least always am. Look! I can see some of the driveway! Behold! I can see the path to the door! We have not beheld this sight since December. The ground is bare. In places. It does seem to be melting. Nights still go below freezing. But we are getting there. Breakup is a frustrating season. Too much snow and slush to bike. Snow quality awful, can't ski. Can't garden. Snow on ground, and it is frozen anyway. Grr. So I have to walk. Trouble is I have taken all walks at least a thousand times. Nothing new here!

Well, there is always clockmaking. It will not be long before I inflict it on you again, so enjoy the respite.

Wednesday, April 17, 2013

Finishing a clock (literally)

The time has come, the walrus said, to speak of many things (Lewis Carrol, The Walrus and the Carpenter). And now we have to put on a spurt of effort and actually finish the thing. Literally. Among the major projects done since my last post, the biggest is the minute work. Clockspeak, of course. In my case this is a misnomer. The Center Wheel revolves at a majestic rate of one revolution per hour. Great thing for a minute hand! But, as you will immediately see, this is not really cool for the hour hand. In one hour, given our 12-hour dials, the hour hand has to go round 1/12 the distance. (12 hours in one half-day). So what to we do? Add more gears, of course. Now I had cut these gears on the bandsaw long ago. But now we have to depth the wheels and pinions.  Clockspeak rears its ugly head again. Remember, big gear is a wheel, small gear is a pinion. Depthing means make them run freely. Book recommends sandpaper. I found a better way. Mr Wilding didn't know about Dremel tools or he would have done this himself. Book published in 2002 or so.
 So I did something I should have done long ago. Live and learn. I measured the aperture between gear teeth, and it is close to or exactly 3mm. I searched my inventory of Dremel tool accessories and found a router bit very close to 3mm. I put the wheel into the Taig and the Dremel into my vertical milling attachment. With this setup I could shave 0.01 mm off the teeth, and shave them I did, running the Dremel at max. Saved hours of work. I used my 60-hole dividing head to position (index) the teeth. Forget sandpaper. It was very nice that these things are 30-tooth gears; my 60-hole dividing plate can handle them easily. Pinions done same way; again they fit my 60-hole dividing plate.

This bit done, the we are almost through the major work on the clock. So the big moment has arrived. The clock was taken apart. If you make a clock, you will soon learn that the fate of a clock is to be taken apart. I handed the clock over to John. He is to make it look pretty. He is very, very, good at that.

 Gulp. The paper patterns have been sanded off. I feel lost without my paper patterns. But go they must. So John got rid of them. My only spec was that the various wheels should have different colors. Here, John is staining the Center Wheel. Previously he has sanded it. Gone is the paper. Again, gulp.
 The plates look very nice in a much darker color. They have a certain character.
There are many details with which we have to deal. But amazing.  A piece of very cheap plywood turns out a very nice clock.

Endless details. I have to smooth out the escape wheel. I have to make the pendulum...  never mind. Progress is progress.

While all this is going on I am setting up to make my next clock. It will not be a wooden clock. And that is all I will say at this point. But clockmaking is not a hobby. It is an obsession.

Wednesday, April 3, 2013

Clock: escaping from reality

If all there were to a clock (wooden or otherwise) were a bunch of gears with a weight (or spring) attached, then it is probably pretty obvious that the falling weight would just unwind the gear train at the proper rate for whatever weight you put on it. Minus friction. So how does a clock keep time? It has to have an escape mechanism, clockspeak for a device that interrupts the weight on its Newton-ordained fall to the ground. The escape mechanism on a clock is usually, in a clock, based on a pendulum; since a pendulum of a given length gives you a very steady beat. But alas, there is friction. You can easily make a pendulum. Put a weight on the end of a rod. Put it in some sort of pivot. A nail, say. Push it. You will see that eventually the pendulum beats no more. Friction, you see. So there is another function the escape mechanism must perform. It has to give a bit of a kick to the pendulum, to counter-act the evil friction. Actually, friction can be a Good Thing (TM) else your car wouldn't stop when you hit the brakes, but in clocks we really, really, don't like it. Again in clockspeak, the bit of a kick is called impulsing the pendulum. Over the years, nay centuries, there have been numerous very clever humans who have designed escape mechanisms, as a Google search on "clock escape mechanisms" will convince you. Mine is what the designers of this clock deemed best, a "deadbeat escape mechanism". There are many others.
The basic escape mechanism consists of the anchor and the pallets.The anchor consists of a piece of wood. You can see the anchor very clearly in the pic above. It looks like an anchor! The pallets are pieces of brass. Resist wear, you see. It was fun making the pallets. I milled them on the lathe, but took no pictures because it was a very simple job. Then I filed to the required angles. Now I have to adjust them, but that will take time (it's a clock!) and I have postponed it. I moved on to that tedious job, the minute work as it is called. The thing is, the clock is set up (all those gears!) so the Center Wheel (one of the gears) revolves at 1/60 times a second, or in other words one minute. But there is an hour hand. It must go around the dial much slower than the minute hand. In fact it must go around 60 times slower. (assuming you have a 12-hour dial). More gears. That's what the minute work is for. Another gearbox. Now the wheels were cut out on a bandsaw by hand. Hardly precision work. Furthermore here are small imperfections caused by the fact that you did not drill the holes for the axles, or arbors, exactly where you should. So we have to depth the gears (wheels). In this clock, says Mr Wilding, this involves sanding off bits from the teeth until the gears spin freely. At first I tried sandpaper. Very slow. I spent three days depthing the wheels. Then I got smart. I rigged up my lathe with it Dremel milling jig, which I described elsewhere.


The Dremel has a router bit in it. With this baby I can take off as little as .01 cm (or .0005") at  one go from the wheel. (Not really. This is wood, not metal. Precision is futile). This speeded up the problem considerably. Couldn't have done this with the going train (the main gears) because the wheels are too big to "swing" on my little Taig. Later I got even smarter. But that's another post. Live and learn.


Thursday, March 28, 2013

So just when you thought you were immune from clocks, I have to return to them. I warned you. Clocks are an obsession. Great thing to do in the winter, though. have had a snowstorm and there is a new 40 cm on the snowpole! 

The above picture shows the center wheel. Mr Wilding (whose instructions I am following)  would spell it "centre wheel. " Engineers would say "gear" but I too bow to clockspeak. After all it has been around since the 16th century, if not longer. The pic shows one end of the center wheel.  Mr Wilding put steel ends on his wheel axes. Sound idea. Cut down on friction. Almost any clock plan you will find on the Internet has solid steel arbors (axles). The other end of this arbor is a point. Here I am turning the point on my trusty Taig lathe. I have finally learned how to turn points. It requires a contraption called a compound slide in the US and a top-slide in the UK. No matter, same thing. I could have done it with a file, but the compound is much faster. Good practice, too. Voila the point being turned. By the way, the things we are turning are called pivots in clockspeak. Bearings from where I come from.
 In Mr Wildings's modifications, the points run in brass bushings. A bushing is just a piece of something (my case, brass. And by the way it is very difficult to find brass in Alaska. Not a material in great demand here) with a hole in it. No big deal. However, the bushings must be reamed out to a 60 degree point to accept the points. Further, the holes you drill must accept the bushings as a tight fit. In fact you should press the bushings in. I used my drill press as, well, a press. This means that you cannot trust the hole sizes on the drawings. On the balance, this is not a clock for the amateur.  As the British say, the words do not match the music. For Mr Wilding, who has built more clocks than I have passed power poles, this is no problem. I have had a few problems matching up the two. If only he had corrected the drawings!

 Above, I am using a 60 deg reamer to ream out the bushings. No major problem there. Next problem is pushing the bushings into the "plates" of the clock. The   plates  are the frame of the clock. If you happen to use Mr Wilding's instuctions you will have drillled undersize. For pressing I use my drill press and brute force. I was careful to drill the holes undersize. A nuisance when it is all done, because I work metric and all my stock is Imperial i.e. RGU, but it can be done.

Here I am pressing the bushings into their holes.I used a 60 deg point. These babies are not coming out with any ease. Good.
 
The next step is to assemble the clock. Again Mr Wilding fails me. The drawinngs all use numbers, but Mr Wilding uses names (third wheel, fourth wheel, etc.). I  really wish  he had corrected the drawings. No matter.  Let's start assembling this thing. First thing in is the  escape wheel:                     
 And next, the third and fourth wheels. Which are obscure numbered parts on the drawings. Grr. I wish Mr Wilding had supplied corrected drawings! No insult to Mr Wilding, but this is my first clock, and the words don't match the music.
Looks like a clock, does'nt it? But alas, there are trials yet left. Although we carefully "depthed" the wheels, the thing sticks. It does not run freely. Lots of reasons, but most likely, when we drilled the holes for the arbors, we did not do it quite right and there are some sticky spots on the wheels. Stay tuned. The wheels must spin freely or we are lost. So back to square here minus one. More to come.

I note that most modern clock plans specify steel arbors. Running on hardwood bearing holes. Probably cheating! But much easier for a good woodworker than the stuff I am going through. And all in RGU, too. Drill 17/128th of an inch. Why oh why RGU?

Friday, March 22, 2013

Winter Scenes

One of the greatest pleasures of the Alaska winter is skiing. I go out nearly every day. The weather has been clear, which means cold. Day breaks at -20C, but by noon it is above freezing, so out I go then. The snow has been beautiful. Long glides! Love it. I have beaten out a loop in the woods. Note the conspicous absence of straight lines. There are no straight lines in the woods. Too many things in the way. Deadfalls. Brush, early in the winter. You detour. The trail gets beaten out early in winter, after that I just follow it. So the loop never takes the same course each year. Also I have a tendency to turn left too much! Must have something with being left-handed. Furthermore there are no "landmarks" in the woods. When the sun is out you have a built-in compass, but sometimes the sun is shy. I could of course carry a compass with me; in fact my watch has one built-in. But then I'd have to take off my glove. A pain. So my trails will break a snake's back. There are no snakes in Alaska; we do have bears to make up for it.

It takes me about 45 minutes to complete the loop. First I warm up on my backyard oval. Then I do the loop. Takes about an hour. Great exercise. If my hands do not freeze. But a dear friend gave me some marvellous gloves, made in Norway by Swix, sold by L.L. Bean, a byword in Alaska. My hands have never been so warm. Thank you, Kathy.

After we have done the loop, the house is in sight and the track is clear. Oh happiness! We have worked out, we will soon be inside, and will get back to clockmaking. I bet you were glad to get a respite from clockmaking, too.

And now for a coda. Composed by Alaska Weather Enterprises. Performed by the Alaska Weather Machine. Yesterday was as clear as the photos above. This morning when I got up it was snowing. My official snowpole says +10 cm. as of 1400 local time. Of course, what the snowpole says bears no relation to what it may be elsewhere; John says there was all of 30 cm (a foot) of snow in the driveway;  He plowed the thing.  Now I realize that by some standards this ain't much. Thing about the Alaska snow is that it stays put, and this distinguishes it from, say, Syracuse NY where it can put down a meter in 24 hours. But it does not last. Ours does. All winter, in fact. Hmm. Today is the equinox, isn't it? Start of spring. Couldn't prove it by me. But if you don't like snow, you should not live in Alaska!  If you do, cross-country skiing is your friend.

There is a place called Cordova, AK. Gets four or more meters a year, and it never goes away. They have real problems. I consider my problems minor compared to theirs.

Friday, March 15, 2013

Clockwork

I am back to clockmaking. I have been running into problems. Mr John Wilding wrote the instructions. But the drawings that come with the instructions do not reflect the modifications. Mr Wilding, as I have said, has built more clocks than I have passed power poles. He modified the pivots. Engineers call these things "bearings". He used pointy steel ends for his axles, which in clockspeak are called arbors. These pointy things run in brass tubes pressed into the clock frame, or plates. . We made the plates in episode 0 of this saga. So I have to make the arbors first, drill them for the pointy ends (called pivots in clockspeak, got that? Even in Italian they are called pivots) and then make the brass tubes, called bushings and this is engineerspeak too, so I can deal with it. Unfortunately the drawings (plans if you prefer) do not reflect his mods. Mr Wilding's mods are really very good; they cut down on friction, the deadly enemy of accuracy on any clock, wooden or otherwise.


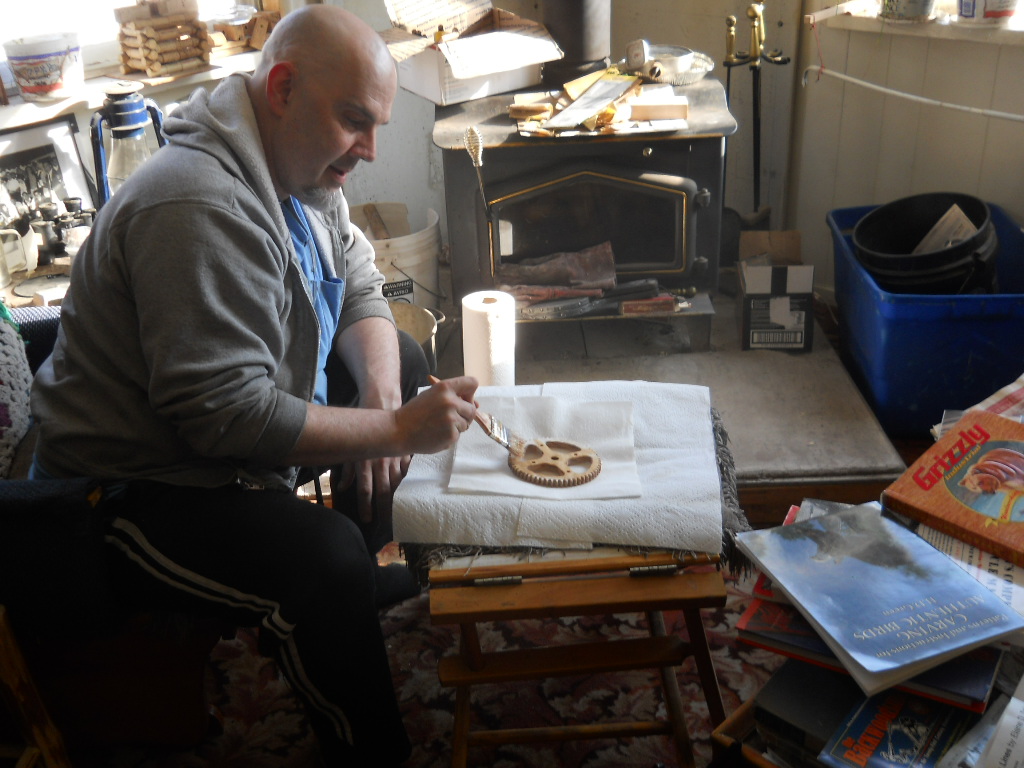
 I first made the "center wheel" arbor as it is called. It calls for a 12mm dowel and (actually 1/2") and I had no such animal. So I turned down a 3/4" dowel. This was a Good Idea (TM). No commercial dowel is either circular or straight. It is not even dimensionally correct. Above, I am center-drilling the arbor to put a pointy thing (pivot) through it. Now this is no mean feat on the Taig lathe. You must support the outboard end so that the arbor does not whip about. I used my home-built steady-rest, mentioned elsewhere. This required boring out the center hole on the steady-rest to 12 mm + which was a project all by itself.

Finally I had the hole drilled. Now for the pointy thing (pivot) itself. This is a piece of steel hardware store rod with a 60 degree point on it.
 This was a breeze. I have finally learned how to turn points on things. I still have to work on my finish. I suspect my carbide tools are finally wearing out.  I am supporting my pivot on a collet. I have but the standard set of collets for the Taig lathe. But when you can use then they are marvellous. No runout (off-center) at all, unlike a standard chuck. Plus they will not take your fingers off, unlike the standard Taig chucks.

This pivot goes into the bushing -- or as Mr Wilding calls it, a bush. So we have to turn a bush from brass. This involves (1) cutting the thing, with a hacksaw, from my priceless stock of brass that I found at Fastnall in Anchorage, (2) drilling it through, (3) cutting a taper same as the pivot and (4) cutting to length.

Above I am at the stage of cutting the 60 degree taper on the bushing. I am using a priceless 60 deg. countersink picked up at Lowe's. 'Twill do. The other end of the arbor is a plain old piece of steel. Hardware store! I gave it a skim on the lathe to true it up. When all this is done, we can shove the wheel onto the shaft. This particular wheel has no pinions attached, a blessing. It will drive the minute hand.

So there we are. In the meantime we have have had lots of fun (and a great deal of trouble) making the arbors for the gear train that gets you from the escape wheel to this particular wheel. But the clock is beginning to take shape.

I am not in the least ashamed of my efforts so far. As the British say, the Words of my tune do not match the Music. Mr Wilding's variations on the clock (all for the good) do not match his drawings. And so I have to stop and figure things out. Worse, Mr Wilding uses RGU all the time. I refuse to work in RGU so I have to stop and convert, almost all the time. Then I have to deal with the RGU feed on the Taig lathe, but that is simple;  at least it's decimal and not absurd fractions of an inch. Next episode will detail (I hope) the rest of the "going train" which is clockspeak for the gearing that gets you from the pendulum beat to the hands on the clock.


Sunday, March 10, 2013

Ansd it's off to Nome!

Time for that great Alaskan institution, the Iditarod. Pictures from last weekend, to be sure. Should have posted earlier but as usual life got in the way.

For those of you who do not wish to bother to look up my previous posts, the Iditrod is a dog sled race. Anchorage to Nome, over 1600 Km, with a slight detrour between Wasilla and Willow. Not enough snow these days to go the whole way, 50Km or so, because Wasilla is an urban heat island these days.  By great good fortune the race passses less than 2 Km from home. n fact as the road goes it is exactly 2.7 Km or a mile and a bit. So there we were. We took hot drins, padding, and our warm clothing although the temeratures were extremely mild, freezing or so. When we got there,  we found the usual Alaska family festival atmosphere. People bring tents, food, barbecues, children, and snow machines. These are known as "snowmobiles" in other states. These are thousands of them. Well, quite a lot, anyway. We arrived with a certain amount of time on hand. The  trick is not to be too early. The race starts at 2PM. It will take them about 25 minutes to get to where we are.

Still it is a big thing when the first teams arrive. They are in strict start order at this point, chosen at random. They have a compact not to get ahead at this point. That can wait for Rainy Pass. Still it is very exciting when the first team appears.

It is kind of difficult to take photographs,. because the sun is shining. Good, yes? Not for photography. You can't see your viewscreen (it's digital, stupid) in the glare! So eventually the driver goes past.

And if you have a program you cheer the driver on by name. Go. Joe! Always some people who are prepared. I am not one of them. The start order is on the Internet. I should really print out the start order!

Fianlly the dogs recede into the distance. We are thrilled. I'd be a lot more thrilled if it weren't for all those snow machines, but then, I am atavistic.

And they are off to Nome. Woof! Love those dogs. They are happy. They are pulling. That is their job. True craftsmen, er, craftsdogs. They are doing their job, and doing it well. As we admire crafstmen, we should admire craftsdogs.