Wednesday, September 18, 2013

Snow Spitter 2.0, update

Our snow spitter progresses. Pervious episodes have documented the building of this contraption. Most of this work is John's. I have held tools, passed screws, and found tools. Now we get on to the superstructure.
We have added cross-beams and diagonal braces to the basic structure.  More diagonal braces to come. Note the plastic bags at the bottom of each upright.  This is vapor barrier stuff. Next is John's idea. To suppost the ridgepole use plywood. We have a big stash of outdoor plywood, kindly left behind by the previous owner of the house. Or someone. Here we are cutting a big triangle out of plywood. The big triangle will be notched to take the ridge beam, and the triangle (actually two of them) will be screwed on to the cross-beams. Plywood is amazing stuff. It will take enormous loads, because the plies in the plywood go at different angles to the grain. Nothing like free plywood.
Today John got the triangles up and the ridge beam placed. I neglected to take photos of this operation. But the ridge beam is up and running. Well, sitting, really. We very much do not want it to run. We want it to be still. The real purpose of the snow splitter, as I must have said before, is to keep the snow that slides off the roof from blocking out access to the house; save hours of shoveling hard compacted snow. This is impact loading. All the stuff you leaned in the strength of materials courses does not apply. It has to take a very sudden overload for about the one minute it takes the snow to slide off the roof. After that, the static load is trivial.

Anyway it is very pleasing. This is a much better structure than we put up last year, so we live and learn. I will add some more photos as this project progresses.

The birches have started to turn yellow. It is fall. More on that later. As usual our projects  progress JIT (Just In Time). Today it was 3C and that's warm. It got to 0.5C last Sunday. Close to freezing. 34F for metrically-impaired audiences. So it snowed in Fairbanks today. We have a very limited time to complete this project.


Thursday, September 12, 2013

You will remember our snow splitter. It collapsed under the onslaught of a thaw plus a lot of snow on the roof. If you don't remember, the relevant tag is "splitter."
So we are rebuilding the splitter. This time we used batter boards.
 A batter board is a simple framework upon which strings are set up. You adjust the strings so as to have equal diagonals. It is much easier to adjust strings than to adjust big heavy posts. You try to keep the string square, but the ultimate test is the diagonals. This is used both by constructors of big heavy structures and by cabinetmakers. If your diagonals are equal, the strucure is square, and that gets you out of a great many difficulties, because in construction you cannot rely on carpenter's squares, and the same is true for cabinetmakers. You should level the strings. I used a line level for the purpose. Then I sawed a notch in the batter board so that I wouldn't lose the reference.  Now you have corners for your framework. You dig holes at those corners.

Then (much later, like today) we set up the posts. Below, Fluffy holds up a post prior to leveling. John has rigged supports so we can plumb the posts.

 Once you have the batter boards (and the strings) it is relatively easy to set up the posts. Note that we have encased the posts in plastic bags. A bit of insurance against moisture seeping in.  We thank Fluffy's father for the advice. The posts are supported by temporary braces. Thanks, John.

And the rest is pouring concrete. So we did. A bag of concrete, high-early-strength (HES) stuff does the trick. One bag per upright post, but just in case we will add some more concrete. Lowe's is your friend. In the picture above Fluffy and John are recycling our concrete bags to provide a tent for our concrete, in case it rains tonight. It probably will. This is Alaska. Fall is rainy.  It has rained continually for the last week. This one day, it did not rain, and  we got a lot done. The posts are plumb . We will pour some more concrete as insurance, but this is a major step forward.

Wednesday, August 28, 2013

Moose, MAWS, and folkore

As I said in my last post, folklore has it that a bunch of (any flavor) CDs repel moose. Not wanting to lose any more of my garden, I went out and strung up some CDs on string all around the garden.I called it MAWS (Moose Alert and Warn-off System) in the best acronym-insanity fashion.

I only had so many spare CDs. I do not use these contraptions very often. I must say, if the wind is blowing they certainly sparkle.  I put up all I had. Would it repel moose? Often there is some truth in folklore. But not this time. When I went out next morning, all my cabbage had been cleared out. I was devastated. Mooseburger looks better all the time. So, folklore. CDs may repel moose when the wind is blowing. Not enough experimental data to confirm. But it is certainly dubious at best. Next year, a real fence, with big heavy logs, to keep out the moose. There are some consolations, however.

 From the garden, summer squash. Below, zucchini and Japanese cucumber from the greenhouse. The Japanese cucumber is a winner. Will plant again next time. And we have parsley, Cilantro, and even some very small green beans in the garden. One chard is left. It was a happenstance, there must have been one seed stuck in the Earthways seeder when I planted it. Considering  how late it the squash was planted, I consider squash  a major miracle.

Meanwhile in the greenhouse I actually have some fair-size peppers. I am impressed. The moose will at least not venture there.

Thursday, August 22, 2013

The attack of the killer moose

The perils of Alaska gardening are many. John greeted me today with the news that a pair of moose, mommy and child respectively, got loose in the garden. The good news is that he chased them (he was up early!) off and the damage was contained. The bad news follows.

Now I know that in the midwest deer are pests. Say you will about Bambi, when he eats up your hard-planted and cultivated corn, over which you have toiled for months, you begin to think that bambiburger is not such a bad thing after all. But I have been gardening here for about ten years. Only Cassius, whom I think has a label all to himself, was a pest. But Cassius was a special case, an obvious moose school dropout. We now have a repeat instance of the incident.
The broccoli is destroyed. Gone. Vanished. Eaten. It was the best broccoli I ever grew. At least we got to taste it before it was gone. There are moose prints all over everything, hope they show up. If not imagine big big prints in the mud (it has been raining for what seems forever). Amazingly the cauliflower survived. But all the leaves are gone. They left the cabbage untouched. We must be thankful for small mercies.

 Another shot of the cauliflower devastation. Moving on to row 1 (back) we see that the chard is gone, kaput, and over. I love chard. This hurts too. The beets survived, again a small mercy.
It could have been worse, I suppose. I seem to have connoisseur (or is that connosieuse?) moose. They went for the edges. And they left all the cabbage.

Conventional wisdom says that CD records blowin' in the wind will scare the moose away. I will try this as soon as the rain stops.  Myself  I would prefer #7 birdshot in the very large derriere of a moose. Nothing like reinforcing the lesson, see the Cassius posts. I would hate to kill a mother and child over anything as trivial as my garden, so #7 is the call, not the 30-30. And aim at the posterior. But you have to catch the culprit red-handed.

The greenhouse is unscathed. Another mercy. There is an ancient military saying. "Once is an accident. Two times is coincidence. Three is enemy action." Probably coined by Alexander the Great. I think it is CD time, even if it is only coincidence. Moose are supposed to be stupid. I notice they picked me, and not the Russians. That is because I am the outpost. Always attack the outpost. Maybe moose not so stupid after all. Sun Tzu himself would have done no better.


Monday, August 19, 2013

The pendulum swings

It has been raining cats and dogs. Or in Spanish, always more colorful, palos de escoba  y capuchinos de bronce. Brooomsticks and bronze capuchins. I assume capuchin Friars made out of bronze are extremely heavy. So with the rains. So since I can't go out and weed without getting soaked I have been doing some clock  stuff.

This time we will make a pendulum. The pendulum is an antique device. Galileo was the first person to document its workings, but it must have been known before that, because Galileo, smart as he was, did not invent it and never claimed he did. However, he did scope it out. He worked out the basic pendulum formula, which you can find anywhere and I will not repeat it. It is a curious fact that a pendulum with a one meter length will do a beat (the "tick" of "tick-tock") in one second. Almost. When the Frenchmen of the 18th century invented the so-called metric system (it should properly be called the decimal metric system) they considered using the length of a pendulum that beat one second as the length standard. They wisely rejected this, because they realized their time-keeping devices were crude. Instead they took a ten millionth of the Earth quarter-meridian as a length unit, AKA meter, and proceeded to measure out the length of the meridian -- a monumental undertaking by any standard. Especially during the Revolution, when surveyors were regarded as spies.

But we digress. Let us make a pendulum for the clock. We are fortunate that the major part of this is simply a commercial three-foot dowel from Lowe's. But a pendulum needs a bob. This is a heavy piece on the end of the dowel. I was fortunate to secure an offcut from one of John's projects, a piece of oak, intended as a stair riser. After a lot of staring at the drawings I finally figured it out (I think) and decided I needed a circle 80mm in diameter. So I got an offcut, marked out 80mm with dividers, and roughed it out on the bandsaw. Now we have to get it circular. This is lathe work, of course. You will soon find that if you need A you firt have to make B. In this case B turned out to be an arbor (lathespeak and not clockspeak) to hold the piece you need to machine. This took me an afternoon, but I do not feel bad about it because (a) I have an arbor for the future and (b) I learned a lot. I used a piece of very nice steel rod, taken from a defunct printer, to make the arbor. So let's put it on the lathe.
 The Taig lathe will "swing" a maximum of about 110 mm -- that is the center height is 55mm  or so(actually 2.25"). It is an RGU lathe. The bob is very close to the limit of the lathe. Wood or no. It is not only the swing, it is getting the tool to work. It took quite a lot of maneuvering with angles, tools, and general fussing around to get it down to where I wanted it, 80 mm diameter.

 At the end, we turned the thing. It remained to drill a hole 1/4" through it. This was a major undertaking. A "jobber's length" 1/4" drill can do the job. Barely. My drill press can drill 50 mm , but it is outclassed  by the 80 mm diameter. I finished it up with a cordless. And no drill goes straight, nor round.  More about this some other time.

So here's the pendulum:


The pivot is the circle on top. Then the 3' (about 94cm) rod, then a sleeve, and then a piece of hardware store threaded rod, below of which sits our bob. I will have to make up a stand, because as you can see, the pendulum is too long to clear the cart which John built for me. It's a few cm, that's all. Not too bad for a couple of rainy days. The reason for the threaded rod is rating. By adjusting the nut at the bottom of the whole thing you can adjust the beat to accomodate friction, weather, and other misfortunes.

Thursday, August 8, 2013

Clocking the clock

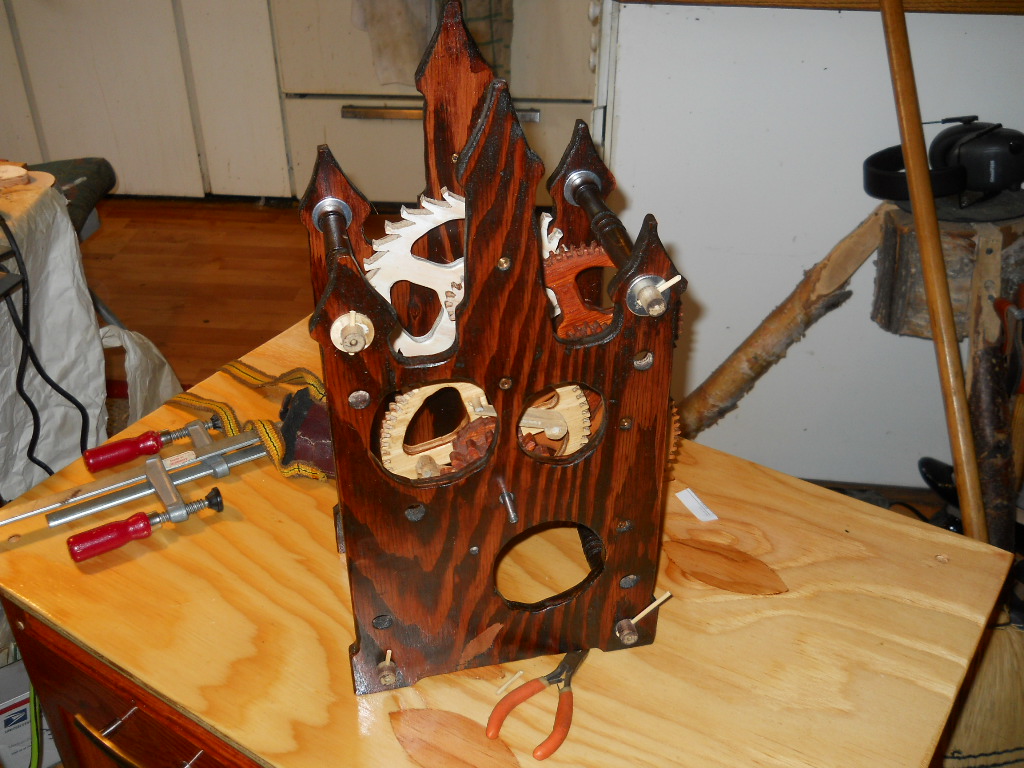
This year the mosquitoes have been worse than I have ever seen. I have a head net. This is how I have been able to work in the garden, walk, ride my bike, and do a few other things. But it has also started to rain. Good for the garden. Bad for outdoor work. The long and the short of it is that I have some indoors time. I have spent it on the Wood Clock. You will recall that we had gotten it to its semifinal state, but time out was taken to finish the wood. So one rainy (or mosquito-y) day I put the thing together again.

Alas, it was jammed up tighter than the proverbial drum. It really looks pretty, though. Problem is, the finishing process destroyed -- or at least seriously interfered -- with the fit of the teeth. So begins the ordeal of refitting. First thing I did was to put a dial test indicator on the wheels. This gadget is cheap and amazingly accurate -- it can be read to .0001" ( thou) or .01 mm, one "cent". It took some doing. First I had to clamp the clock to the table. Actually to the super-cart that John made for me. It is fantastic. For this I used Jorgensen screws -- wooden clamps -- on the clock itself. Then I clamped a found piece of steel to the bench. That gave the magnetic base of the indicator something to latch onto. The British call the indicator a "clock" because it looks like a clock, so I was literally clocking the clock! Americans say "dialing the clock." Same thing. I like "clock" myself.
 

With  the "clock" I found  the wheel diameters varied between +40 and -40 thou (sorry, it's an Imperial Indicator) and that's a bit too much. Lots of reasons for this. One is that the shafts, or arbors, might have warped. Another is that the humidity is much higher. Another is that the arbors are probably off center. A real menace, but a drill bit drills neither round nor to size, and this causes wobble. Lastly, the plates themselves may have warped a bit.On the other hand the pinions were plus or minus 0.010" which seemed quite respectable. I went for the wheels, since they seemed to be the main culprits.

So I went wheel/pinion pair by pair and got them to spin freely again. This is a tedious task indeed. You have to sand until everything spins. On the third wheel I had to cut the teeth deeper, and I used the invaluable Dremel for the purpose. I did say it was tedious and I do not think it redundant to say again that it was tedious.

However, at the end...

...the clock is together again. Note that the finish is gone from all the teeth. It spins freely. Any binding would stop your clock. Mr Wilding's ideas on pivots are very good. But the adjustment is critical. What we have is little pointy things (pivots) running in brass bushings, and this is a Good Idea. But if the pivots are so much as 0.1mm too short they fall out of the bushings. If they are too long they bind. The pivots must have some slop, called endshake in clockspeak. About one mm. If this is not provided, once again the clock binds. The clock has to rattle a bit. In brass this is no problem; but wood is a cantakerous material.

All the wooden clocks I have seen on the You Tube videos use steel arbors (shafts) and I think this is a much better idea than wooden shafts, even with the steel pivots. Steel does not warp as much as wood. But I followed the original plans and the book, and I learned something!

Meanwhile, I notice that nobody, myself included, can resist spinning the clock as they walk by. It is a Zen contraption.

Thursday, August 1, 2013

One month to go on the garden

The garden is growing. Not surprising, plants do that. What is surprising is that in spite of the very late start we are doing as well as we are. Here we are, August 1. August is named after a long-forgotten Roman Emperor. I digress. Let's have a look at the garden.

 Here we see the cabbages front and left. To the right, the turnips. I like turnips. John calls them "potatoes with an attitude problem." All right. I still like them. Mashed, with butter substitute. I cannot take butter any more, unfortunately. The turnips are ready and I pull them at need. Behind the cabbage is broccoli and we have little tiny brocccoli. Beyond them the cauliflower. No signs of cauling or whatever it is cauliflower does. Now looking southward we have more stuff.
 
On the left chard and beets. I checked the beets today and they are starting their beeting. Love beets, especially in borscht, which my daughter makes so very well.
Then the late potatoes. Then some summer squash. It is doing well. Then herbs. On the right, beans. Will they bean? I don't know. And some junior collards, a desperate last-minute planting. Don't know if they will get there.

In the first picture you see our greenhouse. I have some tomatoes in it, some Japanese cucumbers, some eggplant (an experiment) and some zucchini. The zuchhini threaten the world, like Godzilla. Got to do a post on that. Meanwhile, we are eating fresh lettuce daily; nothing better, all red-leaf but it was, as I have said before, a difficult spring. And the potatoes are doing just fine, thank you. Root vegs do very well in Alaska. I may have some mystery vegs somewhere here too.

For such a late start, I am satisfied. At least two weeks late. Nothing I could do about it. Us mini-farmers, and even Big Ag with their million-dollar machines, cannot modify the weather.

So we weed, and we water. And we mow the "lawn" which unfortunately today cut my hose into pieces. I really have to bury the hose, but then, what to do about the winter? Maybe some pipe; run the hose through it. Bury the pipe.  Got to think about this. How to drain it in winter? Food for thought. Meanwhile we are growing food. Nothing is more satisfying.